It’s the time of year that leaf peeping photographers search for that perfect landscape photo with colorful foliage from the foreground to the background. Once that perfect location is found, the challenge is dialing in the proper exposure and focus settings to capture a photo with a pleasing composition, proper white balance, balanced exposure (minimal loss of detail in shadows or highlights), and acceptably sharp from foreground to background. When tutoring DSLR/Mirrorless clients https://www.davidhoodphotography.com/phototut/, I talk about this phase of the process as the vision phase. It’s important that the photographer have a firm vision of the desired outcome in order to determine the best exposure and focus settings for the the next phase of the process – the capture phase. The purpose of this post is to provide some landscape photography tips.
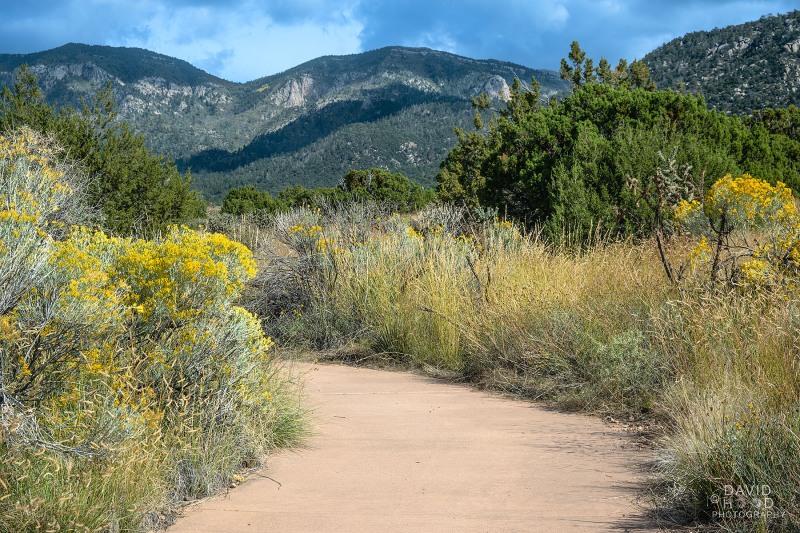
This post will concentrate on the capture phase. Composition is a subject unto itself, and is an essential element of the photographer’s “vision” of the capture. Yes, there are “rules” for composition (rule of thirds, leading lines, etc.). Lighting conditions, practice and experience will soon give you an “eye for photography”, and you’ll know a good composition when you see it. For the photo below https://www.cabq.gov/parksandrecreation/open-space/lands/elena-gallegos-open-space my vision was for the leading lines of the pathway with colorful flowers on either side to draw the viewers eyes toward the Sandia Mountains in the background. I was using my Nikon Z50 with the 16-50mm kit lens.
So let’s get to it and review the thought process behind determining the camera settings for the capture phase. First, I teach my students owning a modern DSLR to shoot in raw mode (as opposed to jpeg mode) because raw mode provides much more latitude than jpeg in editing a photo to maximize the details often lost in shadows and highlights.
Now the thinking behind the exposure settings for this landscape photo. Of the 3 elements of the exposure triangle, shutter speed is the least critical. Since I was shooting hand held, I wanted to be at 1/60th second or greater in order to minimize the effects of camera shake. In this daylight setting with plenty of ambient light, I wanted the second element of the exposure triangle, the ISO setting (the sensor’s sensitivity to light), to be as low as possible in order to minimize “noise” in the photo (artifacts or specs in the image caused by high ISO settings). The third element of the exposure triangle, the aperture or f/stop, is the most critical setting of any landscape photo because it (as well as the distance from the closest item of interest in the foreground) establishes the depth of field. The smaller the aperture setting, the greater the depth of field (distance between the nearest and furthest elements in a scene that appear to be “acceptably sharp” in an image). I wanted an image that was acceptably sharp from front to back, and at the same time wanted an aperture at which my 16-50mm kit lens was sharpest. For most lenses, this “sweet spot” is at apertures f/8 to f/11 so I chose f/10 for my aperture. Using the f/10 aperture and ISO 100, the resultant shutter speed required to center my camera’s meter was 1/250th second.
The remaining decision was where in the scene to focus to achieve acceptably sharp focus from front to back. Landscape photographers use the hyperfocal distance (the point nearest the camera at which the depth of field extends to infinity at the selected aperture) to determine where to focus. There are smartphone apps to calculate this point, but in actual practice placing your spot focus on a point roughly half way into the scene (which I did) provides acceptable results.
I’d be remiss if I didn’t introduce the editing (aka post processing) phase of creating a landscape photo. It’s during this phase that the photographer takes the raw image from the camera sensor to editing software and turns a good photo into a great photo by adjusting pixels for white balance, tonal qualities, colors, vibrance, saturation, highlights, shadows, contrast optics, cropping, size and sharpness. I teach my clients to use the Adobe Creative Cloud photography plan subscription software package; specifically, Adobe Bridge (the library), Adobe Camera Raw (raw processing), and Adobe Photoshop (final editing).
I find that every photo shoot provides a learning opportunity. In future photographs of this kind, I’d like increased sharpness – particularly in the background area of the photo. I had to use an Adobe Camera Raw layer mask with the clarity slider to improve the sharpness of the mountains in this photo. But the real lesson learned here is that focus stacking is the surest way to move from “acceptable focus” to real front to back sharpness. Focus stacking with the Nikon Z50 has to be done manually, one frame at a time, but with a tripod and patience it can be done. Perhaps I’ll address focus stacking in a future post.
Capture the Memories Found in Travel and Life Email: d300dave@gmail.com


