My previous post https://www.davidhoodphotography.com/las-parras-de-abiquiu-bed-breakfast-vineyard/ talked about an overnight visit to a lovely bed and breakfast in Abiquiu, NM which is in the dark sky area of central New Mexico on US Highway 84, west of Santa Fe.
This post will be part tutorial and part lessons learned from my first attempt at creating a Milky Way photo. I’ll cover tools and resources used, exposure settings, post processing, and finally, the things I learned that will hopefully improve future Milky Way creations. I always tell my students https://www.davidhoodphotography.com/phototut/ that one of the things I like about photography is that you never stop learning!
A very useful (even essential) resource for anyone serious about capturing anything dealing with astronomy (sun, moon, stars, star trails, Milky Way, etc.) is a smartphone app named Photopills https://www.photopills.com/. It costs about $9, but that’s a bargain for the valuable tools that it provides. The downside is that it’s so powerful that there’s a steep learning curve. If you are new to Milky Way photography, I highly recommend that you download Photopill’s free e-book entitled Milky Way Photography: The Definitive Guide (2021) by Antoni Cladera.
The main takeaway from this guide is that planning is paramount, and the Photopills app is essential to planning the where, when and how of Milky Way photography. The additional key points are these: 1) Use a camera that permits you to control the shutter speed, aperture, and ISO – a self timer or remote shutter release is also important. 2) Shoot in camera raw file format and use a sturdy tripod. 3) Use the fastest (largest aperture) and shortest focal length (16mm-24mm) lens that you can. 4) Focus at night is difficult (but essential). Use the guide and the Photopills app to help you determine the hyperfocal distance to ensure sharpness from the foreground to the stars. 5) Shoot in manual mode at the largest possible aperture. The app will help you determine ISO and shutter speed settings. I used a 24mm focal length at aperture f/2.8 with ISO set to 3200 and shutter speed at 13 seconds with a remote cable release. Your experience may vary depending on camera, lens, location, etc. 6) Finally, turn Long Exposure Noise Reduction off, and remove any lens filter (such as a UV protection filter)
Okay, so I did my best to properly plan my shot. I envisioned a photo with a scenic foreground in a dark sky area of New Mexico that I’d previously visited near Abiquiu named Ghost Ranch https://www.ghostranch.org/.
I used an online Clear Sky chart
Based upon data in the Clear Sky Charts, I’d planned my shot for 10:30 PM. I checked the sky at that time and was surprised that I could clearly see the stars. So Barbara and I went to our pre-selected location to set up for the shoot. Because of the haze, I hadn’t set up for the shoot during daylight, so I knew that obtaining a sharp focus would be a challenge. So instead of trying to determine the hyperfocal distance in the dark, I elected to use Live View on my camera and zoom in on a star to get a sharp focus.
I made the shot with a Nikon Z6 fitted with a Nikon f/2.8 24mm-70mm lens. To help me frame the Milky Way I set my ISO to “auto” which made the sky and Milky Way sufficiently bright. Then, once framed, I set my ISO to 3200 and my shutter speed to 22 seconds (the max recommended for my camera by the Photopills app to avoid star trails). A test shot at this shutter speed resulted in significant over-exposure, so I opted to go to a 13 second shutter speed (the closest setting on my camera to the Photopills app target shutter speed).
Based upon my study of articles from accomplished astro photographers, I decided to use the star reduction technique used in the free PC app Sequator https://www.youtube.com/watch?v=CDuFOotE3xY . This process involved taking 8 “light” exposures all at the same camera settings followed by 8 “dark” exposures at the same camera settings but with the lens cap on. Then you export the light and dark exposures as TIFF files into the Sequator software which uses the light frames to reduce the apparent elongation of stars caused by the earth’s rotation while the shutter is open, and uses the dark frames to reduce noise, or artifacts that appear upon close examination of the background.
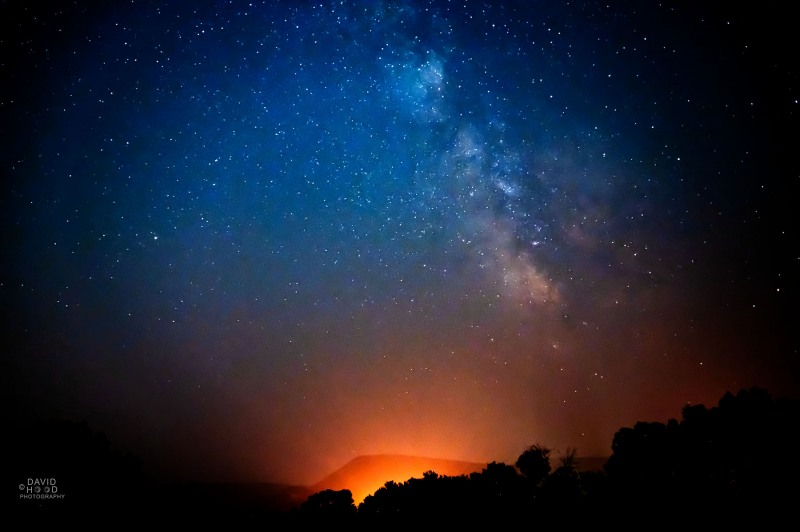
After comparing the Sequator produced TIFF file with a single raw file processed using Adobe Camera Raw and Photoshop, I didn’t find that the star reduction technique was necessary for my photo – probably because the 13 second shutter speed was significantly less than the 20-25 seconds where star elongation becomes more pronounced, and my camera, like many more recent models, handles noise fairly well at the 3200 ISO level. This is the photo from a single file that I created.
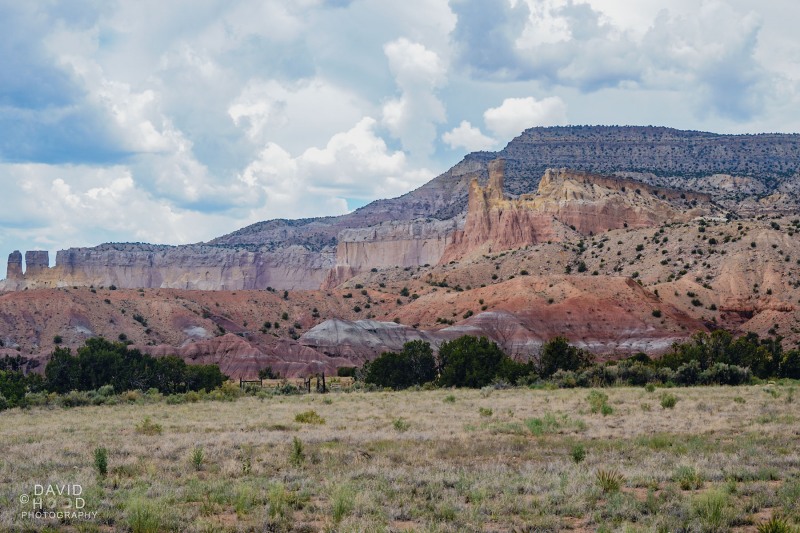
The result was ok, but I was unhappy with the light pollution that appeared in the bottom center of the photo. I learned later that, while not visible to the naked eye from the vantage point of where I took the photo, the neighbor on the adjoining property had a glow light. So I decided to create a composite photo using the foreground from one of my earlier Ghost Rand photos to hide a portion of the light pollution.
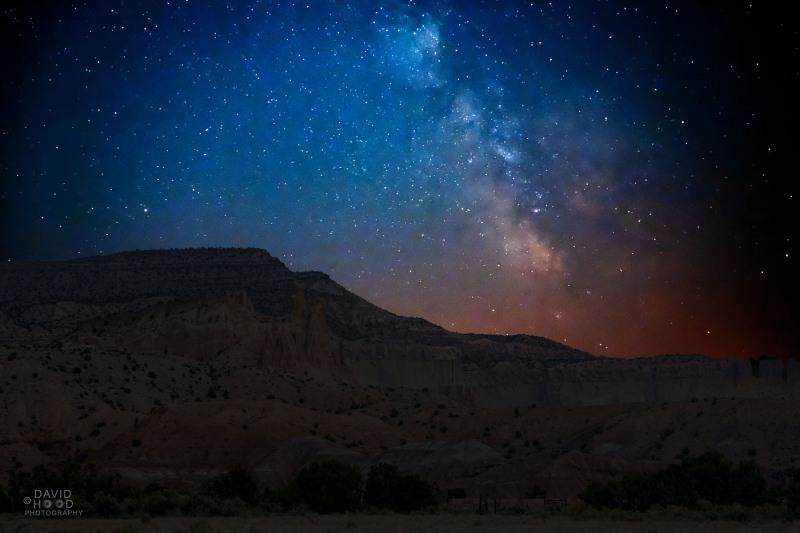
Because the photo was taken during daylight hours, and thus was too well lit to blend with the night time sky photo, I used layer masks in Photoshop to darken the image. I also used the Transform tool to make a horizontal swap to better fit the sky image. This is the resulting image.
I like the image, but there are a couple of things I’d like to do better the next opportunity I have for a Milky Way shot: 1) I need to do a better job of researching potential light pollution issues. 2) I need to set up my camera during the golden hour just after sunset so that I can more easily focus at the hyperfocal distance and capture a “plan b” photo of the foreground in low light – just in case I encounter unforeseen light pollution and need the foreground shot to create a composite.
You too may have problems with your first Milky Way photograph, but you’ll also learn a great deal. Persistence pays, don’t give up!
David Hood, dba David Hood Photography Email: d300dave@gmail.com Mobile: (210) 422-0572
Capture the Memories Found in Travel and Life
Like this:
Like Loading...




David… You know I’m an artist, not a photographer, so I’m not in tune with all the intricacies of what you do and what you wrote. That said, I read it word for word and was engrossed by it all. Thank you so much for writing the blog.
Cheers to you and future photo shoots.
Carolyn
Thanks Carolyn, blogs are a lot of work – so it’s rewarding to hear that there are appreciative followers. Cheers to you and your artistry as well.